How to connect your WooCommerce store to Apollo
Apollo connects to a WooCommerce store through WooCommerce's built-in access approval, so you don't need a plugin and you don't have to create REST API keys by hand. Once connected, Apollo receives new and changed orders and issues invoices and estimates from them automatically, following the rules you set. This guide shows how to connect the store, what happens to orders depending on how they're paid, and where to follow them.
- 1
Open Integrations and choose WooCommerce#
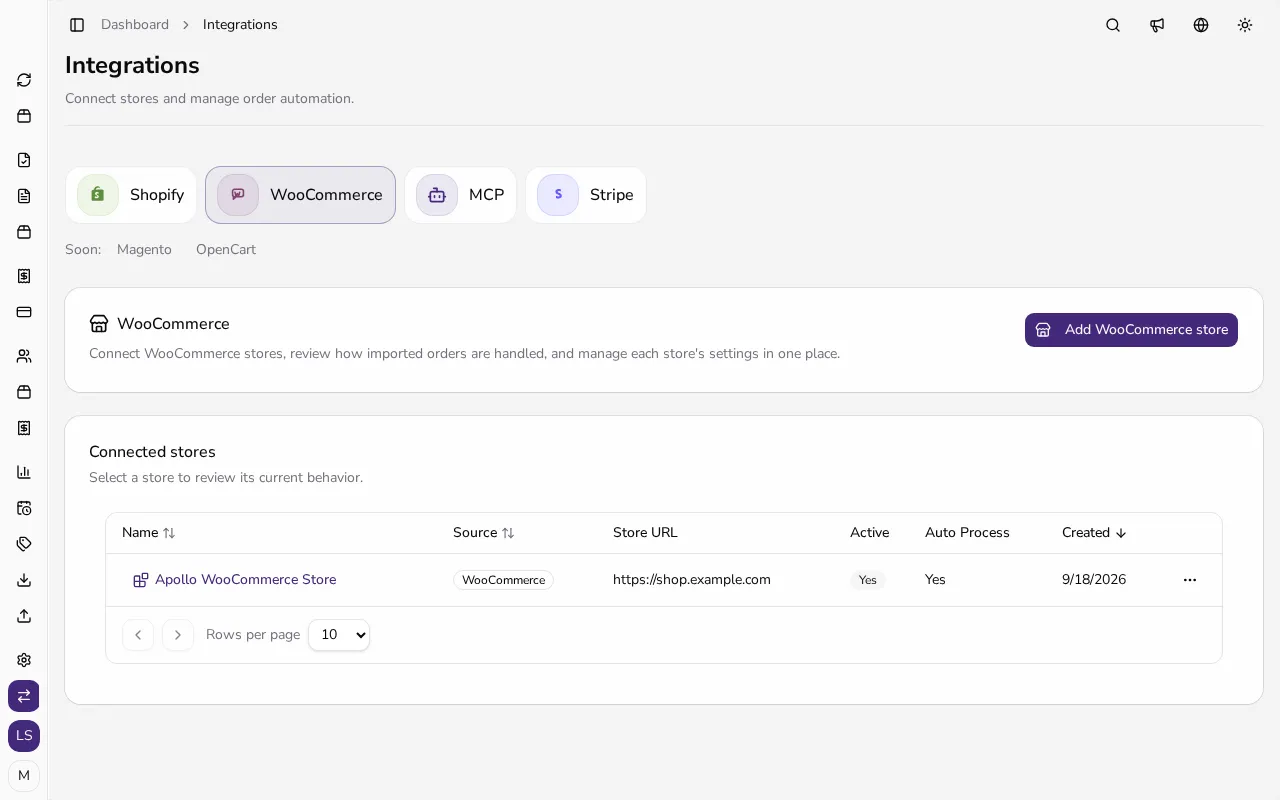
In the sidebar, under Entity, click Integrations and choose WooCommerce. The Connected stores list shows the stores already connected to this company, each with its own settings. Only company admins can add and edit stores.
![Integrations page with the WooCommerce tab selected, the Add WooCommerce store button and the Connected stores list]()
- 2
Enter the store address#
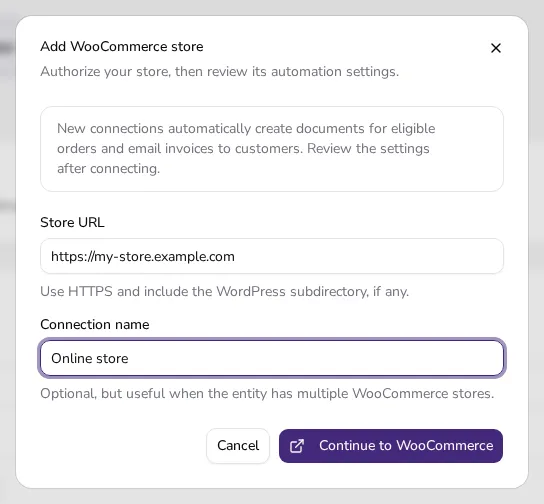
Click Add WooCommerce store. In Store URL, enter the store address starting with https:// — if WordPress runs in a subdirectory, include it. Connection name is optional but helps when you connect several stores. The store has to be reachable on the public internet. Click Continue to WooCommerce.
![Add WooCommerce store dialog with Store URL and Connection name filled in and the Continue to WooCommerce button]()
- 3
Approve access and check the connection result#
Apollo sends you to the access approval page in your WooCommerce store. If you aren't signed in yet, sign in as a store administrator and approve the request for read and write access. WooCommerce then hands the access keys to Apollo itself, and Apollo sets up notifications (webhooks) for created and updated orders in the store automatically. Approve the request within an hour; after that it expires and you start the connection again. WooCommerce returns you to Apollo, which shows WooCommerce connected and opens the store's settings. If you declined the request, Apollo shows WooCommerce authorization was denied. If Apollo couldn't set up the notifications in the store, a Connection needs repair alert appears; click Edit settings and retry enabling the integration.
- 4
Check how documents are created#
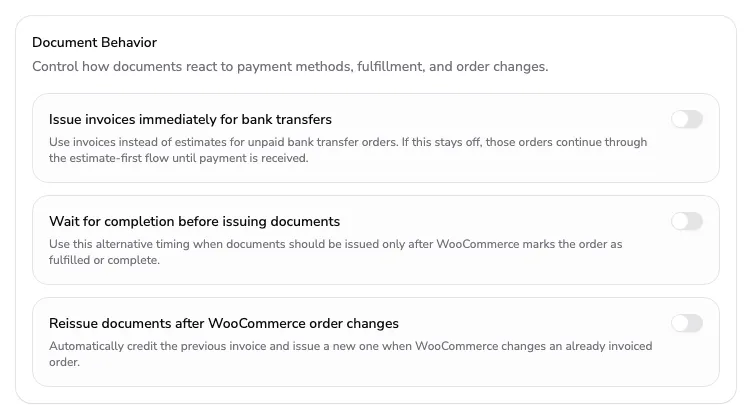
A new connection has Auto Process selected for created orders and emails invoices to buyers. Apollo processes an order paid through an online payment method only once it's paid; an order still awaiting payment creates nothing. An order paid by direct bank transfer becomes an estimate, which Apollo converts into an invoice once it's paid, unless you select Issue invoices immediately for bank transfers under Document Behavior. A cash-on-delivery order is processed once the order is completed. Change these in Edit integration and click Save. In Portugal, Apollo doesn't send documents by email, so new connections there start with invoice emails off.
![Document Behavior section of the Edit Integration dialog with the bank transfer, wait for completion and reissue options]()
- 5
Know how Apollo fills in the invoice#
The invoice gets the next number in your sequence and uses the order's currency. Apollo looks for the buyer by company tax number or email address, and otherwise creates a new customer from the billing address. It takes WooCommerce prices as net prices and adds the order's taxes, with shipping and fees as separate lines. A line with a SKU is linked to the catalog item with the same SKU. Apollo doesn't import draft orders or unfinished checkouts.
- 6
Keep the store's stock in sync#
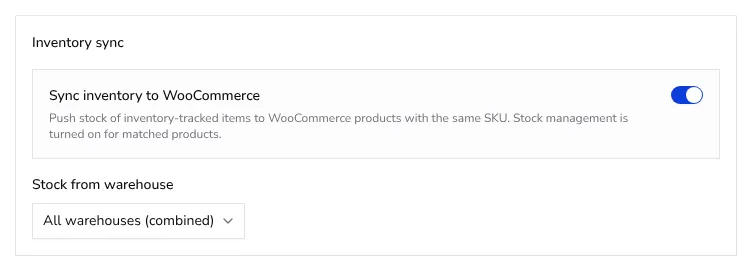
On the Pro plan, Apollo can also push stock to your store. First make sure Inventory management is turned on under Settings → Entity → Inventory, and that the items you sell have Track inventory turned on and a SKU. Then open the store's details, click Edit integration and, in the Inventory sync card, turn on Sync inventory to WooCommerce. If you have more than one warehouse, Stock from warehouse lets you pick one warehouse or All warehouses (combined), the total across all of them; then click Save. Apollo matches each item to the product or variation with the same SKU (upper and lower case don't matter), turns on stock management for it and sends the stock as a whole number, with negative stock sent as 0. Changes from invoices, credit notes, expenses and manual movements reach the store a few minutes after the first change, and a daily refresh corrects any drift. Orders that haven't been invoiced yet don't reserve stock: Apollo sends the stock it has on hand. Only WooCommerce stores are synced.
![Inventory sync card of the Edit Integration dialog with Sync inventory to WooCommerce turned on and the warehouse choice set to All warehouses (combined)]()
- 7
Follow the imported orders#
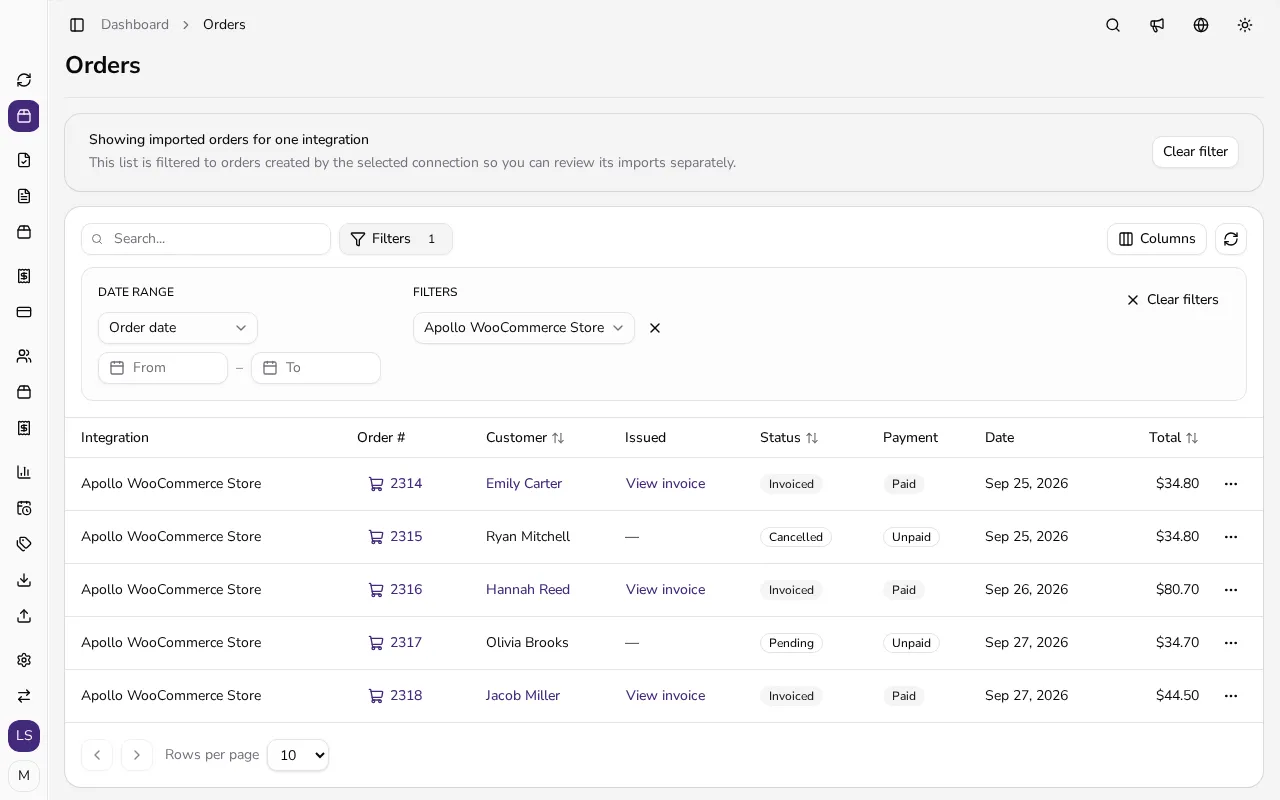
Click the store's name and then View imported orders in its details. The Orders page is filtered to that store and shows each order as Pending, Invoiced, Estimated, Cancelled or Failed, and the Issued column opens its invoice or estimate. For a failed order, the icon next to its status shows the reason; once you've fixed it, choose Reprocess order from the row's menu.
![Orders page filtered to the WooCommerce store, with orders in the Invoiced, Pending and Cancelled states]()
- 8
Import older orders or remove the store#
Apollo doesn't import orders placed before you connected the store. In the store's details, click Import recent store orders, choose a period of up to 90 days and confirm with Start import; if WooCommerce pauses the import at its safe limit, start it again. To remove the store, choose Delete integration from the row's menu — Apollo also removes its notifications from the store, and issued invoices stay.
Tips
- Before you start, make sure the store is reachable over HTTPS — Apollo doesn't accept store addresses that don't start with https://.
- Importing older orders uses the current settings, so eligible orders can create and send documents. If you don't want that, clear the email options under Communication before the import. In Portugal, Apollo doesn't send documents by email, so there's nothing to turn off.
- If FURS fiscal verification is on, choose the Business Premise and Electronic Device under Compliance Defaults, and fill in the API Default Operator under Advanced Settings in the FURS settings.
- Before you turn on stock sync, give your Apollo items SKUs that match the SKUs of the products in your store. Items without a SKU, or without Track inventory turned on, aren't synced.
Frequently asked questions
Do I need a plugin to connect WooCommerce?
No. Apollo uses WooCommerce's built-in access approval, which hands the access keys to Apollo itself, and Apollo sets up the order notifications automatically.
Why does a bank transfer order become an estimate?
Because it isn't paid yet. Once WooCommerce marks the order as paid, Apollo converts the estimate into an invoice. If you want the invoice straight away, select Issue invoices immediately for bank transfers.
What does the Connection needs repair alert mean?
The access keys were saved, but Apollo couldn't set up the required order notifications in the store. Open the integration with Edit settings and retry enabling it.
Can I connect the same store twice?
No. If a store with the same address is already connected and active, Apollo doesn't start a new connection. When you reconnect an inactive store with the same address, Apollo reuses it.
Which products does Apollo update?
Only items with Track inventory turned on and a SKU, and only the products or variations in the store with the same SKU (upper and lower case don't matter). Apollo turns on stock management for them. Items that aren't in the store are skipped and tried again at the next change or the daily refresh.
Why can't I delete a warehouse?
A warehouse selected for stock sync can't be deleted. In Edit integration, choose another warehouse or All warehouses (combined) under Stock from warehouse, or turn sync off, then save and delete the warehouse. The default warehouse, and warehouses with stock movements or used by documents, can't be deleted either.