How to add a customer in Apollo
Before you can issue an invoice or an estimate, you need a customer saved in Apollo. A customer can be a buyer, a supplier, or both, and their details are filled in automatically on every new document you create for them. Here is how to add one in a few steps.
- 1
Open Customers#
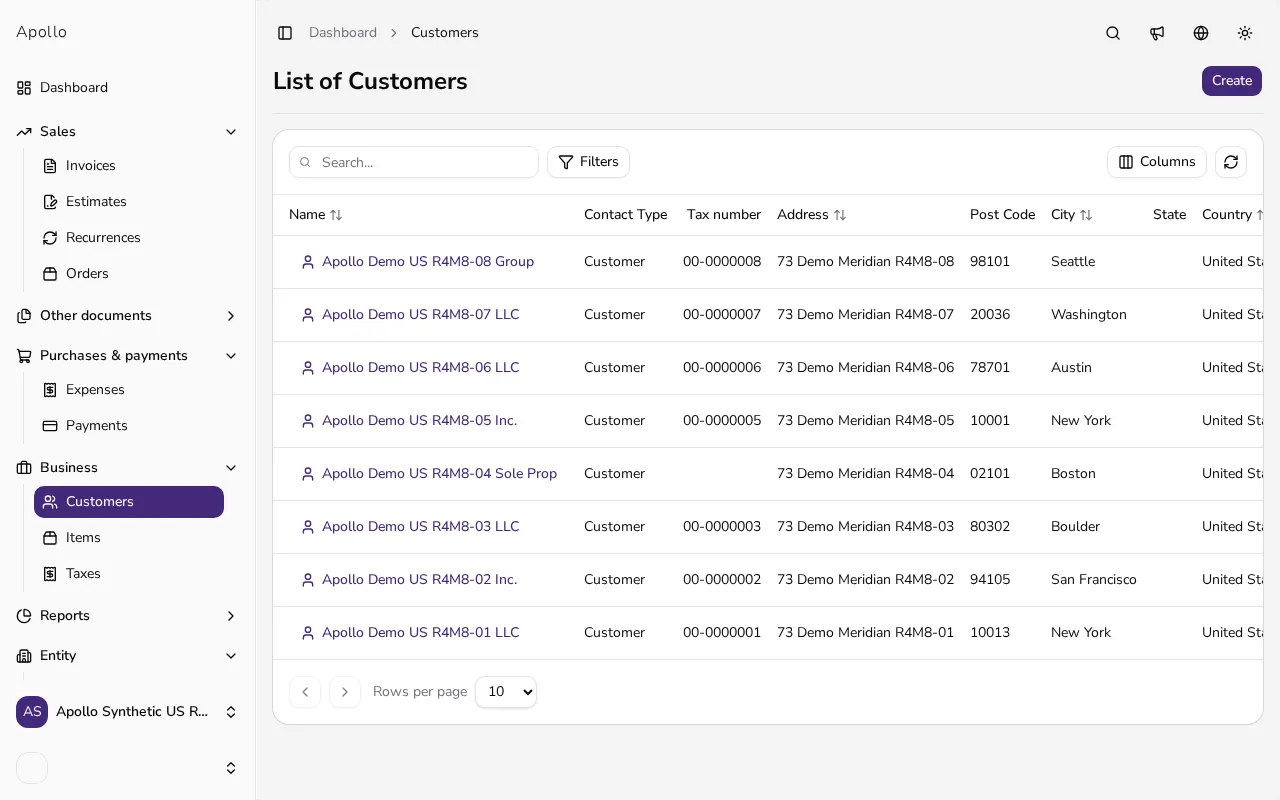
In the left-hand sidebar, click Customers. This opens the list of every customer you've added to this company so far, with columns for name, contact type, tax number and address.
![List of customers in Apollo with a button for creating a new one]()
- 2
Click Create#
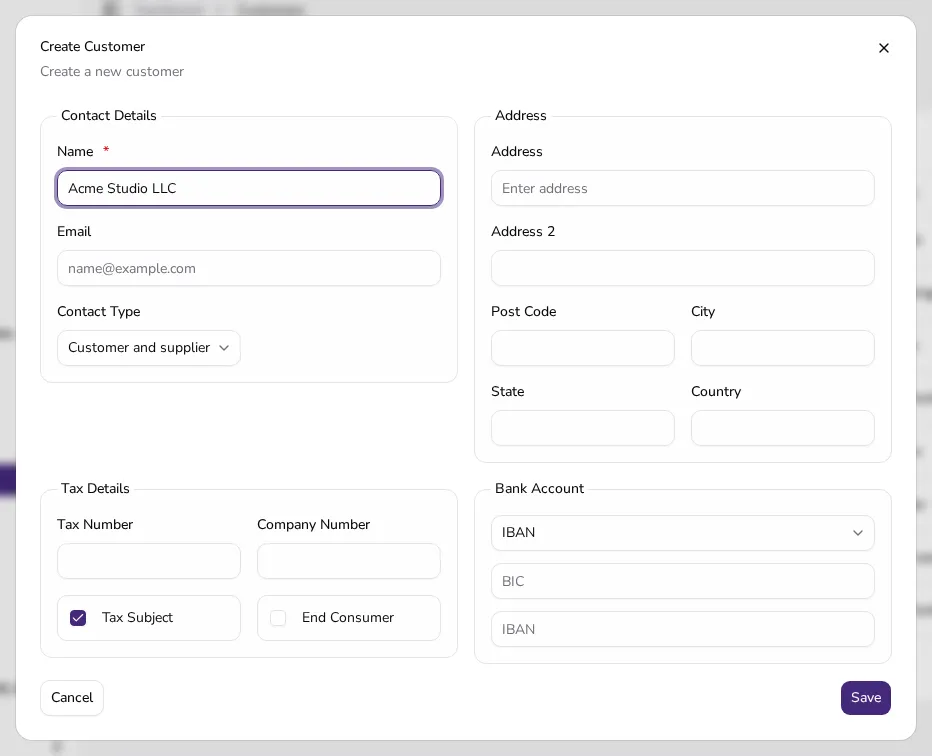
In the top-right corner, click the Create button. A form for a new customer opens, split into Contact Details, Address, Tax Details and Bank Account sections.
![Open form for adding a new customer showing contact and tax detail sections]()
- 3
Fill in contact details#
Enter the customer's Name (required) and, if you have it, their Email. Choose a Contact Type: customer, supplier, or both — this decides whether they can appear as the buyer or the supplier on your documents.
- 4
Add their address#
In the Address section, fill in Address, Address 2 if needed, Post Code, City, State and Country. These details are printed on every document you issue to this customer.
- 5
Enter tax details#
Enter the Tax Number and Company Number if the customer has them. Use the Tax Subject and End Consumer checkboxes to mark whether the customer is registered for tax and whether they are a private end consumer. For a business in another EU country, the tax number is what lets Apollo apply reverse charge; the two checkboxes are saved on your documents and used in tax exports, e-invoices and fiscal records.
- 6
Add a bank account (optional)#
In the Bank Account section you can save the customer's IBAN and bank name. This is mainly useful when the same customer is also your supplier and you pay them yourself.
- 7
Save the customer#
Click Save. The customer is added to your list, and you can immediately open their profile from the confirmation, or find them again later under Customers.
- 8
Check the customer profile#
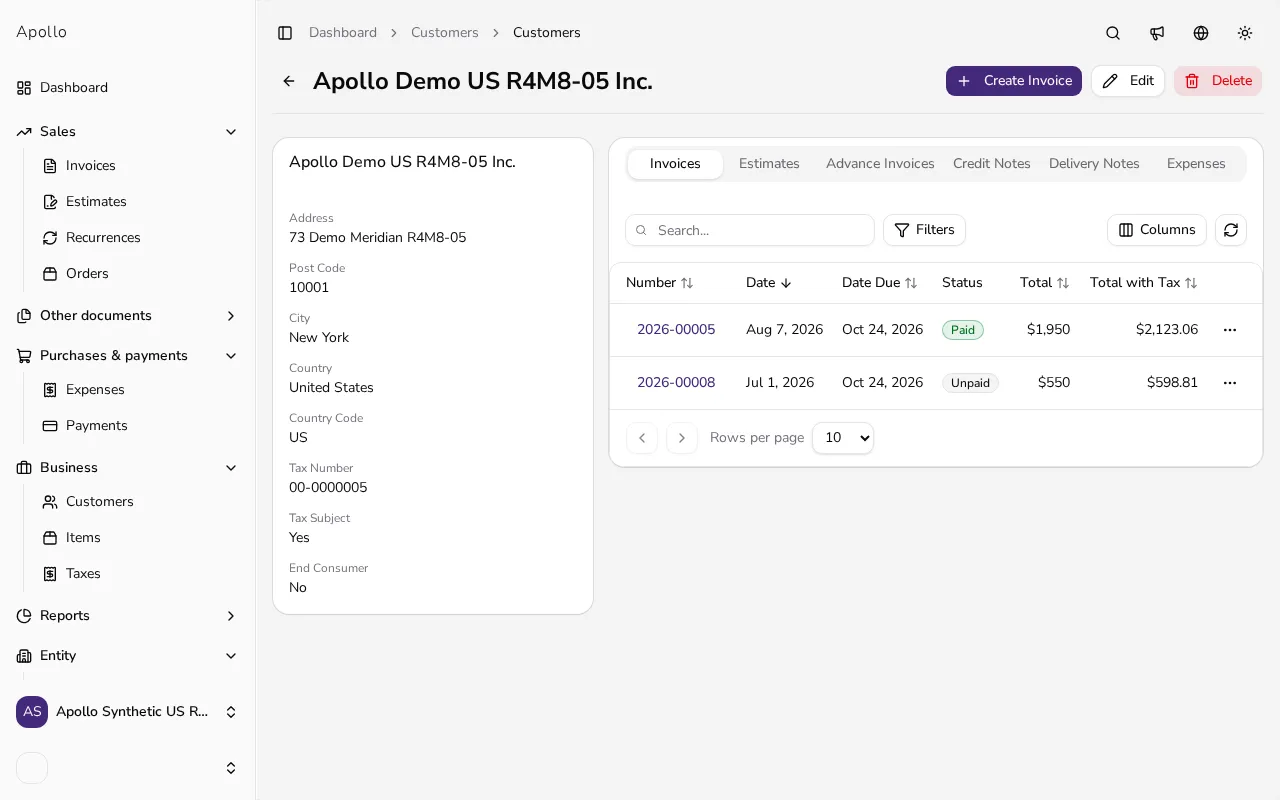
Click the customer's name in the list to open their profile: their details on the left, and tabs for Invoices, Estimates, Credit Notes and other documents on the right, showing your whole history with them.
![Customer profile page showing address details and a list of issued invoices]()
Tips
- Pick "Customer and supplier" as the contact type if you both invoice this person and record expenses from them.
- Add the tax number and company number when you create the customer — you'll need them later for e-invoicing and exports for your accountant.
- You can edit a customer's profile any time with the Edit button in the top right, without deleting and recreating them.
Frequently asked questions
Can I use the same customer for both invoices and expenses?
Yes. Set the contact type to "Customer and supplier" and the person will be available both when issuing invoices and when recording expenses.
What does the "End Consumer" checkbox mean?
It marks the customer as a private individual rather than a tax-registered business, which can change which fields are required on an issued document.
Do I have to fill in the customer's bank account?
No, that field is optional. Fill it in only if you need it, for example when you also pay this customer as a supplier.
Where do I later find every invoice issued to this customer?
Open the customer's profile from the Customers list — the right-hand side lists all their documents grouped into tabs by type, such as invoices, estimates and credit notes.